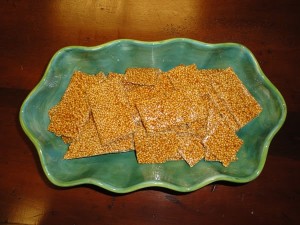
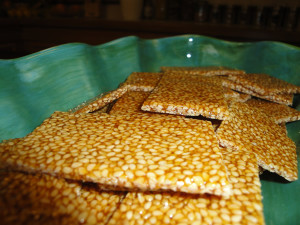
Sesame Snaps, Canadian Goodness!
So when DH and I moved from Canada to the USA 14 years ago, we noticed that they didn’t have one of our loved snacks, Sesame Snaps! It is such a simple treat, yet it seems so complex at the same time!
Well, lately we have been having a lot of different seeds and nuts on our salads and yogurt, etc. DH decided he wanted to get some sesame seeds for snacks in his trail mix. It got me to thinking about Sesame Snaps! I thought, man, I should just make my own. How hard could it really be? So I went on a Google search. I found a few different recipes and they were interesting, so I combined a few different aspects of what I found, into my own recipe.
Here it is:
Karma’s Sesame Snaps
1 1/3 c. Toasted Sesame Seeds
1 1/2 c. Brown Sugar
1 T. Butter
2 T. Honey
1/4 Fresh Squeezed Lemon
1/4 t. Vanilla
FIRST: Grab a cookie sheet, preferably one with no edges. Butter or spray it with cooking spray. Also butter or spray a rolling pin and have these items ready as you will have to act quickly when everything is done cooking.
If you don’t have toasted sesame seeds you can toast your own. I threw mine in a pan and turned it on medium and stirred them for a few minutes. Never leave your seeds on the stove unattended as they WILL burn! You will want to watch them very carefully. Another way you could do it is to put them on a baking pan in the oven at 350°F (180°C) and stir them a few times for 20 minutes. Set these aside.
In a small heavy sauce pan, you will want to combine all ingredients but NOT the sesame seeds. Stir the brown sugar, butter, honey, lemon and vanilla together on a medium heat with a candy thermometer until it gets to 310 degrees or to hard crack stage. It should be an amber color when it is ready.
Take the candy mixture off the heat and quickly stir in the sesame seeds. Coat the seeds thoroughly and then pour the whole mixture onto the cookie sheet. Press everything down and then roll it out on the pan. You should be able to cover most of the pan. Now, grab a pizza cutter or a knife and score it into pieces. If you wait too long, it will be too hard and it will just crack into chunks rather than having a nice smooth edge.
Once this has cooled a bit, but not all the way, remove the pieces from the sheet and place them on a plate to cool the rest of the way. If you wait too long, they could stick to the cookie sheet.
Apparently these will keep for a week in an air tight container, but I don’t see why they can’t keep for even longer in the fridge or even in the freezer.
DH was so surprised when I made these and our son even ate them and liked them. Now that is a rare thing from such a picky eater!
ENJOY a little chunk of Canadian goodness! 😀


